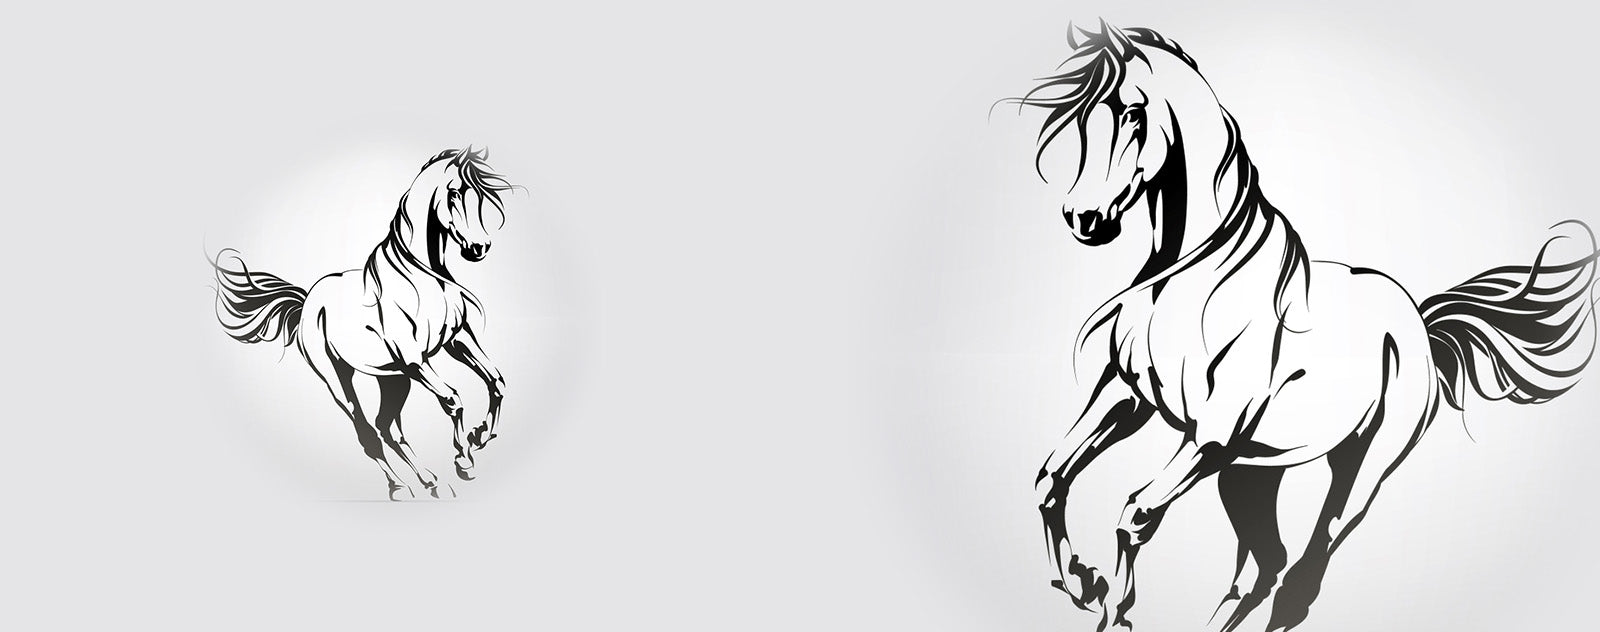
Wondering how to draw a horse face-to-face?
We are here to provide you with all the control you need. Before getting to the heart of the matter, let's note this :
Horses are elegant and fascinating animals. And it is precisely because of this great fascination, as well as the role they play in our lives, that artistic depictions of horses abound.
In this article, we will see:
- How to choose our horse to draw ;
- The steps to follow to draw it;
- And some tips to have a beautiful drawing.
Let's start the article now!
Tutorial to draw a horse more easily

It is believed that since the Bronze Age, man has domesticated horses: since then, these evil animals are often in spite of themselves at our side. Whether saddle horses , carriage horses, draft horses, we have always given a specific role to these animals. In this guide, you will learn how to make a horse portrait from scratch.
In this tutorial you will be taught how to draw a realistic horse step by step without any reference. You will learn how to build his body from simple figures, and how to add all the details. And above all, I will teach you how to get the right proportions for the horse's body.
All you need is a willingness to learn, a little patience, a few graphite pencils of different hardnesses. A sketchbook, drawing paper, a white eraser, a bread eraser and a pencil sharpener.
Let's start!
- Snout
Make a skeleton of the mouth of your future horse. To do this, t stroke z a straight line that ends in a curve to draw the muzzle.

- Noses and eyes
Make the eyes and nose of the horse.

- The head
Above the eyes, make the animal's head and ears.

- The neck
Add the neck. To achieve it, t draw two curved strokes from the head to the back.

- The first foreleg
Draw the first leg with the different joints. Finish it with an oval circle at the bottom to form the hoof.

- The second foreleg
Bring the second leg to life while following the same instructions. It should be close to the first leg in front.

- The body
Now think about the body. Continue the two lines previously formed for the neck, Extend them to the back of the animal.

- The first hind leg
Build the first back leg. Make a paw quite similar to the first.

- The second hind leg
Follow the same process for the second back leg.

- horsehair
Draw wavy lines to represent the hairs of the lower extremity of the legs of the animal and those of the tail.

- Muscles
Add outlines to your drawing. Put the muscles on the foot, on the body to make it even more realistic.

- The perfect horse
You have your perfect horse there now. Do not hesitate to erase any small imperfections in the contours of the drawing.

- horse in color
To embellish your drawing, you can color it with a color of your choice. Do not fail to admire your work.

Observe the animal's head
The spine must be rigid since we are dealing with a "ruminant" herbivore. It therefore has a fairly rigid column to support its belly and digestive system. We're also going to talk about the head of the beast, which, as always, can be broken down into simpler shapes .
We start on a trapezium / triangular shape, for the bulk of the head. To which we add a more or less round shape for the cheek and the same for the muzzle. The eye is placed in the first quarter of the head and on the line of the third in height.
sketch the horse
I mainly use geometric shapes and the simplest possible ratios of proportions to guide you. Because we find it much easier to understand and integrate. So we base ourselves on a photo to draw our horse.
We're just going to go freestyle on the tail floating in the wind because we don't want to reproduce the model. We think it would be a little weird in drawing by the way (it sometimes happens that even by copying reality exactly, it doesn't work, because it's drawing).
The sketch of the head

We will start with the head which I will break down into several steps. We start with the trapeze. Its base should be about twice as wide as the end towards the muzzle and two and a half times as long.
Then we draw the circle of the muzzle and that of the cheek. The neck is then traced, as long as the head, a hair wider at its base and a little narrower at the base of the skull.
animal body drawing

Let's draw a rectangle about once the length of the neck high. Then the head of our horse and twice the length of the head and the neck. This rectangle will be used to contain the whole body of our horse.
Let 's place the floor line. To find it, it's simple: you must be able to wedge a second rectangle under that of the horse's body. The bottom edge is our floor . If you are also tempted to draw a panda, here is a nice article about this beautiful legendary creature.

The drawing of the head

Our model is in profile, which greatly simplifies things for us. So, we have already drawn a good part of the basic structure. As I said above, the eyes are placed in the first quarter of the head. About and one-third up. As with all herbivores, horses' eyes are placed on the sides of their heads. In order to be able to monitor their environment and take off if a predator shows up .
From the front it is much clearer. It is clearly seen that the eyes are located on the sides. We can break down the shape of the head. A large rectangle for the muzzle, a trapezium for the forehead and the top of the eyes, a triangle for the “cheekbones” and a rectangle for the cheeks. Without forgetting the two diamonds for the ears of course. But back to our profile view, not quite profile either. I will place the diamond-shaped ears. In terms of their length, it must be the same as between the eye and the base of the ear.
Be careful to place them correctly. I add the cheeks, more square than our original circle, pay close attention to its placement and inclination. I also refine the shape of the muzzle, tilted downwards. The nostrils which are ¼ the height of the muzzle. I consider for the base that they are round. We will detail them later. We can wedge a little less than another nostril between the nostril and the line of the mouth. We take the opportunity to give it a nice curve by the way.
The sketch of the body of the horse

Let's go to the neck. Here, we want to bring out the musculature. We have the throat in the front, the same muscle we have in the neck. Which starts from the ear and attaches to the base of the neck in the middle. And the muscle that begins the back that starts from the neck and continues to the withers (the top of the horse's shoulder ).
Draw the body of the animal

From there, we divide the front face of our parallelepiped into three roughly equal parts. One will correspond to the chest and shoulder, the middle one to the abdomen and the last to the rear end. In reality in the case of the horse the abdomen is slightly wider. We will therefore slightly increase the middle portion. We're going to draw a kind of diamond shape. We divide that in two then we trace the beginning of the abdomen .
For the front legs, we start with a kind of flared cone. A ball for the knee then a rectangle. Another ball , a right for the front of the hoof. We also take the opportunity to bulge slightly above the shoulder. And we draw the line of the back more hollow and rounded at the level of the croup. The abdomen is quite simple, it is a large oval. Be careful, it does not go up to the back, there is the spine above.
The rear end now! Draw a relatively round shape for the rump . Principle similar to the front legs, we draw a cone for the beginning of the hind leg to the knee. Only difference, no ball for the joint, we will simply draw a second line to widen the end of the cone. Then we put the other leg behind. We add a cylinder ending this time with a ball and we observe the same process for the hooves .
Draw the tail, mane and body of the mammal

To finish the line! It is placed in the first third of the croup and for the length, it is as you prefer. We do not forget the mane of course! As soon as you put a little muscle, it becomes much classier. And we have our completed horse drawing . You thought it was over? Oh no. We still have to clean it all up and add the details. We did the biggest, rest assured.
sketch the head

We show you step by step how to proceed for the head. The majority of our features are drawn, we redefine the silhouette of our horse . For that the photo reference is your best friend. Keep in mind this: the eyes are the widest point of the skull, the tip of the nose generally slopes downward. The lips are thick.
The eyes have a nice shape and are smaller than the nostrils. The nostrils precisely have a very particular shape, but quite simple to make in the end. We do not forget the ears of course and the fringe of the mane.
Apply color to the drawing

For once, we don't want to follow the colors of our model but to make a horse dress (gray with the black mane basically). We will therefore use our basic reference to place the lights and our color reference to use the right colors.
Still difficult to really explain the whole colo step by step, take a good look at your model and understand its volume. We start as always with our base color . A slightly yellowed gray on the whole of the body except the chest which tends more towards a bluish.
We also put the dark color of the legs, the tip of the nose and the mane of the blow which is the same color. It is not a pure black but a bluish gray for the front legs and yellowish for the hind legs . We will add the spotted effect later so that those who are in traditional can also follow.
Put the light on the sketch

Our light comes from the left and seems relatively low (it must be morning or evening, no doubt). So we're going to place our lights. For the body, we will take a slightly yellow white. I also take this opportunity to vary the shades in certain places with pinks or blues. Always staying consistent. For the chest and the head, a rather pink hue . For the bottom of the legs a lighter grey, as always yellow for the hind legs and bluish for the front legs. Same principle for the mane . If you know how to do hair, it happens pretty much the same way. So we laid down our base color.
So we're going to set our lights now. The colors are very similar to those used for the legs, so we let you reuse them. On the other hand, the treatment of the mane is different. On our model, the mane itself is hidden by the neck, so it will be quite simple to deal with, but his tail on the other hand is going to be a good styling exercise. So let's set our lights. The light source has not changed, never forget where your light comes from. For hair, horsehair , fur in general, you must always follow the direction of implantation of the hairs. That is, your brush strokes should always follow the direction of the hairs.
Don't smudge something horizontally or in small circles. It won't work. So we start from the root and follow the mane and tail. This rule applies to everything: both shadows and lights. It's super important. This means that we will end up with “wicks”. That's good, that's what we want. To start , do not start with a very fine brush to do each hair independently of the others. Here again, it's quite classic: we start from the general to go towards the specific. Basically, we start with large volumes and refine little by little to detail.
Apply shading to the horse

Same principle for shadows. The first level of gray will be grey, always yellowish or bluish / purplish depending on the areas. And a darker gray for the legs. It's time to bring out the muscles and bones of our horse. In general, they are powerful animals and it shows. As always, take the time to work well on shadows and volumes. However, be careful not to lose or forget the structure below. If you are particularly studious and curious, you can simply go for anatomical references of horses, to see what their musculature looks like and therefore avoid modeling a shape that you do not understand and which will look weird in the end. As always: if you don't understand, it will show.
The shadow tint of the mane
Same principle for the first shadow shade on the mane. No, it's not black. On the mane we remain quite simple. Only small details remain like the hooves and the head. For the hooves, we will take a base shade close to that of the legs, but more brown / ocher. Add the shadows to the hooves. And you can now add the little spots all over the place. They will have the color of the tint a shade darker each time. That is, in the light areas they will be the color of the base tint, in the base tint area they will be the color of the first shadow tint.
And in the shadow tint area you have two options: either you take a new, even darker tint. Either you take the middle shade and you make lighter spots. It's up to you . Since we are on a view from afar, we will not see small details like the hairs on the muzzle . Veins and small folds under the eyes. So no need to do them. So let's recap it all. We start by finding simple ratios of proportions and geometric shapes that are easy to draw to lay the basic structure. We refine by thinking about the frame and the musculature of the horse.
We finally detail based on photo references for the small details that look good. For color, again, take references, there is a huge variety of coats for horses. As always, identify the light source and stick with it. Preferably, if we have trouble, we take a photo reference so as not to make mistakes. We do not hesitate to bring variations in the colors for more realism. Again, everything has a certain logic. If in doubt, refer to anatomical charts to fully understand the volumes you see.


